With MailVideo, you don’t have to film everything in one take. You can divide your video into different clips, making it easier to create professional content and even switch between different cameras or recording setups.
Why Use Multiple Clips?
Flexibility and Control
- Perfect Each Section: Record each part until you’re satisfied
- Switch Cameras: Use different angles or recording devices
- Manage Complex Content: Break down long presentations into manageable segments
- Error Recovery: Re-record only the parts that need fixing
Professional Results
- Better Pacing: Control the flow and timing of your content
- Reduced Pressure: No need to get everything perfect in one take
- Enhanced Editing: More control over the final video structure
- Consistent Quality: Maintain high standards throughout your video
Understanding the Multi-Clip Interface
When working with multiple clips, you’ll see the clip management panel on the right side of your video editor:
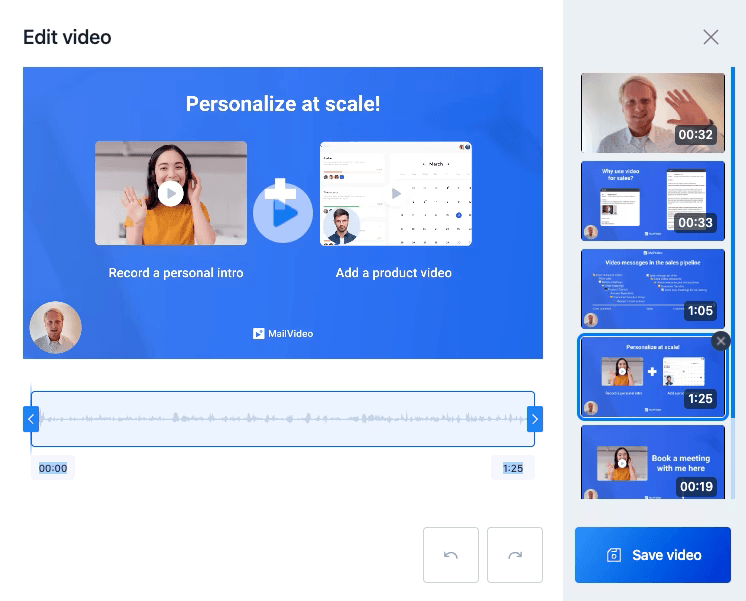
Clip Management Features
- Visual Timeline: See all your clips in sequence
- Drag and Drop: Reorder clips by dragging them
- Individual Controls: Edit, delete, or replace specific clips
- Preview: Review each clip before finalizing
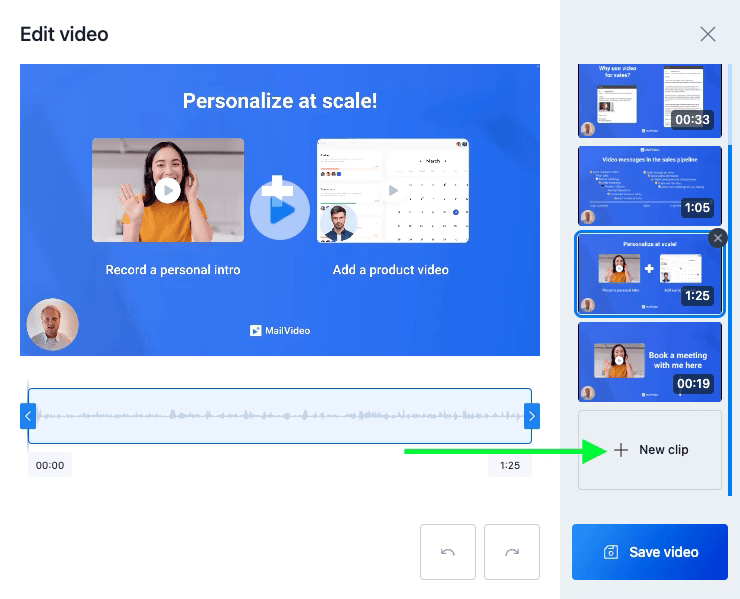
Adding New Clips
To add a new clip to your video, click the “New Clip” button:
Clip Source Options
When adding a new clip, you have three options:

1. Record New Clip
- Fresh Recording: Create a completely new recording for this clip
- Different Setup: Use a different camera angle or recording environment
- Specific Content: Record targeted content for this specific section
2. Add from Library
- Existing Content: Use clips you’ve already recorded and saved
- Team Collaboration: Access clips created by team members
- Consistent Branding: Reuse intro/outro clips across videos
3. Upload from Computer
- External Files: Import video files from your device
- Professional Content: Include professionally produced clips
- Mixed Media: Combine screen recordings with camera footage
Managing Your Clips
Reordering Clips
- Drag and Drop: Simply drag clips to reorder them in the timeline
- Logical Flow: Arrange clips in the order that makes most sense for your message
- Preview Changes: Watch the sequence to ensure smooth transitions
Editing Individual Clips
Each clip can be edited independently:
- Replace: Swap out a clip with a better version
- Delete: Remove clips that are no longer needed
- Trim: Adjust the length of individual clips
- Adjust: Modify settings like audio levels or visual effects
Managing Transitions
- Smooth Cuts: Ensure clean transitions between clips
- Consistent Audio: Maintain similar audio levels across clips
- Visual Continuity: Keep lighting and framing consistent when possible
Best Practices for Multi-Clip Videos
Planning Your Clips
Content Structure
- Outline First: Plan your content structure before recording
- Logical Segments: Break content into natural sections
- Clear Transitions: Plan how clips will flow together
- Backup Content: Record extra clips for flexibility
Technical Considerations
- Consistent Setup: Use similar lighting and audio settings
- Camera Position: Maintain consistent framing when possible
- Background: Keep backgrounds consistent or plan for changes
- Audio Quality: Ensure consistent microphone and audio levels
Recording Strategy
Sequential Recording
- Follow Your Outline: Record clips in the order they’ll appear
- Natural Flow: Maintain energy and continuity between clips
- Reference Previous Clips: Ensure content flows logically
Batch Recording
- Similar Setups: Record all similar clips at once
- Consistent Environment: Maintain the same recording conditions
- Efficient Workflow: Minimize setup changes between recordings
Content Organization
Naming Convention
- Descriptive Names: Use clear, descriptive names for each clip
- Sequential Numbering: Number clips in order (Clip 1, Clip 2, etc.)
- Topic Labels: Include topic keywords in clip names
- Version Control: Track different versions of the same clip
Content Flow
- Strong Openings: Start each clip with engaging content
- Clear Endings: End clips at natural pause points
- Smooth Transitions: Plan how clips connect to each other
- Consistent Messaging: Maintain your key message throughout
Advanced Multi-Clip Techniques
Camera Switching
- Multiple Angles: Use different camera positions for variety
- Close-ups and Wide Shots: Vary your framing for visual interest
- Equipment Changes: Switch between webcam, phone, and professional cameras
- Environment Changes: Record in different locations for different topics
Content Types
- Talking Head + Screen: Combine personal delivery with screen sharing
- Demonstration + Explanation: Mix product demos with explanatory content
- Interview Style: Create conversations between multiple people
- Mixed Media: Combine live recording with pre-recorded content
Professional Techniques
- B-Roll Integration: Include supporting footage between main clips
- Consistent Branding: Maintain brand elements across all clips
- Audio Consistency: Use consistent audio processing across clips
- Visual Continuity: Plan for smooth visual transitions
Common Multi-Clip Scenarios
Training Videos
- Module Structure: Break training into logical modules
- Review Sections: Include summary clips between main content
- Interactive Elements: Add quiz or question clips
- Resource References: Include clips that reference additional materials
Product Demonstrations
- Feature Breakdown: Dedicate clips to specific features
- Use Cases: Show different scenarios in separate clips
- Before/After: Demonstrate results with comparison clips
- Customer Stories: Include testimonial clips
Presentations
- Section Breaks: Divide long presentations into digestible segments
- Q&A Integration: Include question and answer clips
- Visual Aids: Alternate between speaker and slide content
- Summary Clips: Provide recap clips for key points
Troubleshooting Multi-Clip Issues
Audio Problems
- Level Matching: Ensure consistent audio levels across clips
- Background Noise: Minimize environmental audio differences
- Sync Issues: Check that audio and video remain synchronized
- Quality Consistency: Maintain similar audio quality throughout
Visual Consistency
- Lighting Changes: Account for different lighting conditions
- Camera Angles: Maintain consistent or intentionally varied framing
- Background Elements: Manage background consistency or changes
- Color Matching: Ensure consistent color balance across clips
Technical Issues
- File Compatibility: Ensure all clips use compatible formats
- Resolution Matching: Keep consistent video resolution
- Frame Rate: Maintain consistent frame rates across clips
- Compression: Use similar compression settings for all clips
Team Collaboration with Multi-Clip Videos
Shared Libraries
- Team Access: Allow team members to contribute clips
- Organized Structure: Create folders for different team members or projects
- Version Control: Track who created which clips and when
- Permission Management: Control who can edit or delete clips
Collaborative Workflow
- Assignment System: Assign different clips to different team members
- Review Process: Establish review procedures for contributed clips
- Feedback Integration: Allow for feedback and revision cycles
- Final Assembly: Designate who handles final clip assembly
Quality Standards
- Technical Requirements: Establish standards for audio, video, and lighting
- Content Guidelines: Create guidelines for messaging and tone
- Brand Consistency: Ensure all clips meet brand standards
- Review Checkpoints: Build in quality checks throughout the process
Multi-clip videos offer tremendous flexibility and can significantly improve the quality and engagement of your content. By planning your structure, maintaining consistency, and using the tools effectively, you can create professional, engaging videos that effectively communicate your message.